Cosplay: Economy Link Costume
Since
1986, Link, the Hyrulian hero of The Legend of Zelda, has captured the hearts
and minds of generations for decades. As
such, it’s no surprise that many, including you, have elected to honor their favorite
character by dressing up as him.
Many
variations of costumes exist of dizzying complexity and skill. The purpose of this instructional set is to
help you construct a Link costume of economy-class with a minimum amount of
sewing and cost. While the costume will
not be the most ornate or expensive with a budget range of $25-$50, it is easy
and quick to assemble, and you will at least have a passing resemblance to
Hyrule’s beloved hero.
Section One – Materials to Acquire
Ready made materials to acquire:
White undershirt (long-sleeve/turtleneck)
|
Khaki pants
|
Brown knee-high boots
|
Standard brown belt
|
Blond medium length wig (Optional)
|
Wig cap (Optional)
|
Elf ears (Optional)
|
Toy sword
|
Online
Brick and Mortar Stores (Goodwill, Payless, Wal-Mart, Salvation Army)
Trade or borrow items with friends and acquaintances
Section
Two – Construction
Green Hat
Materials: 1 ½ yards of green cotton fabric, fabric tape measure, scissors, pencil/pen/marker, piece of paper, and fabric glue.
Materials: 1 ½ yards of green cotton fabric, fabric tape measure, scissors, pencil/pen/marker, piece of paper, and fabric glue.
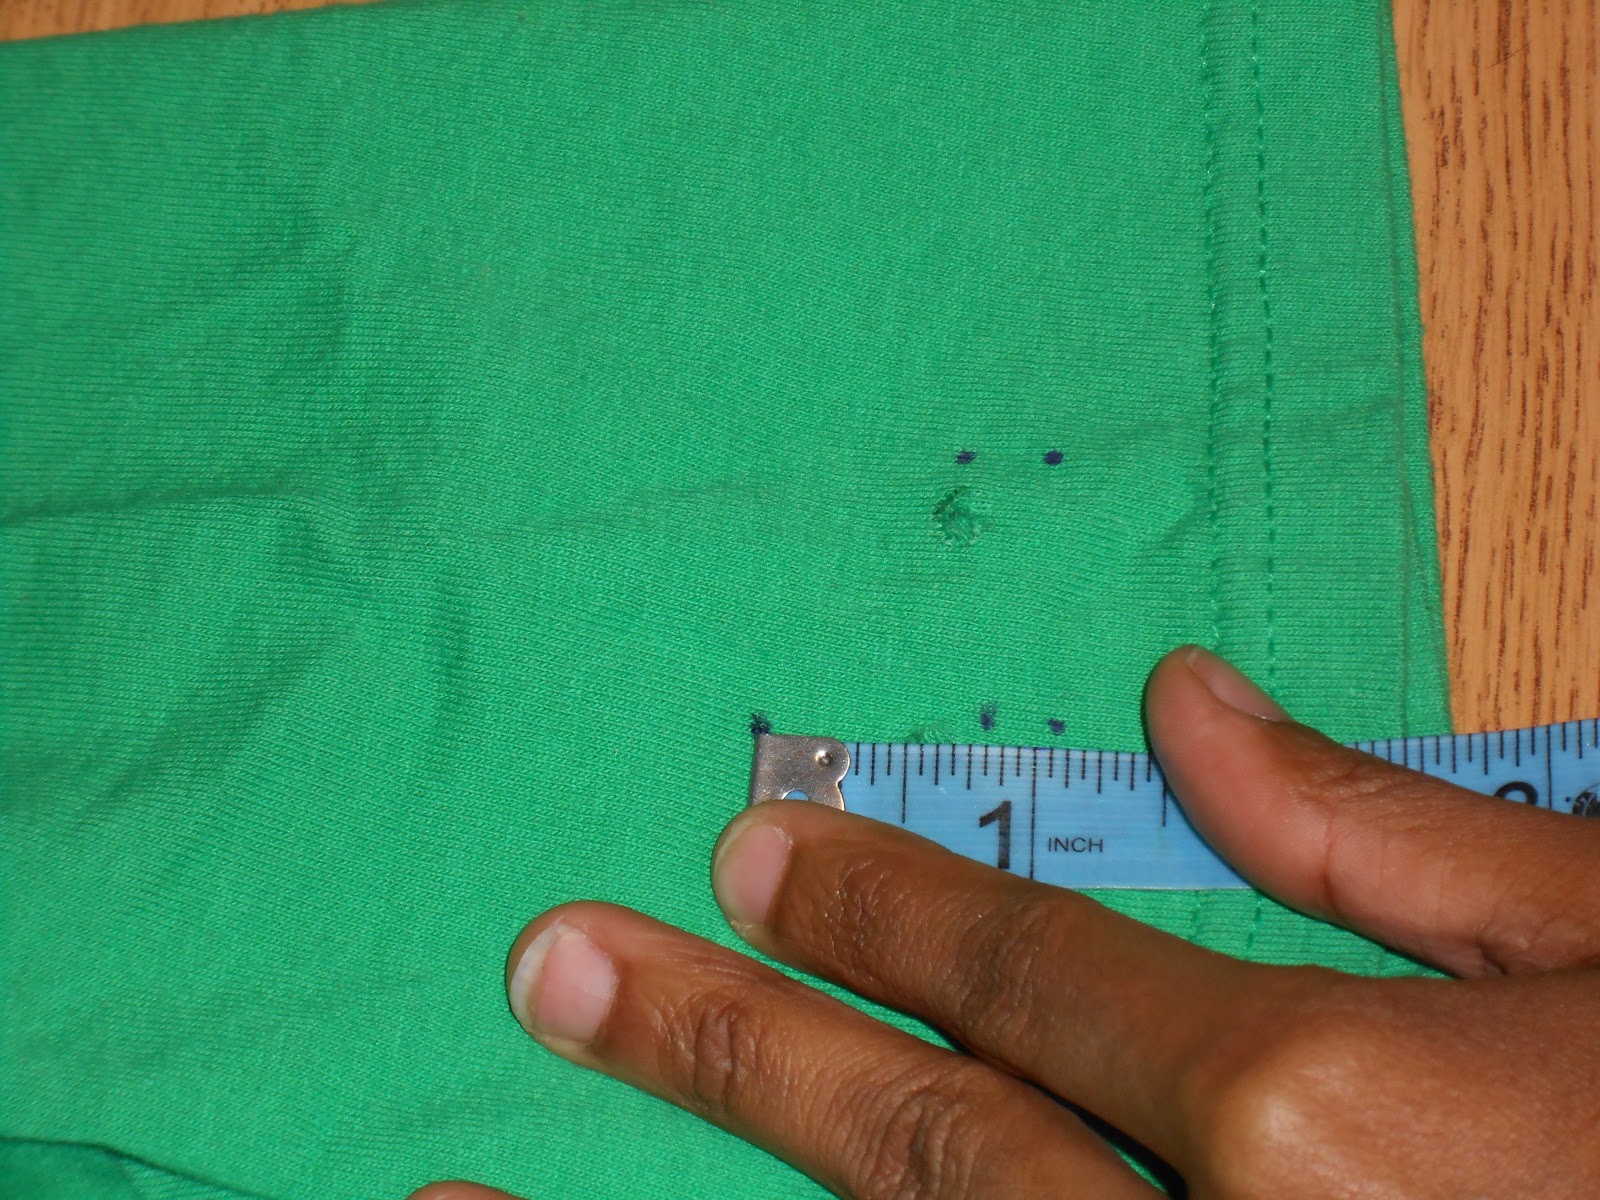
1. To measure head for hat, place tape measure one inch above ears.
 Note: if you are wearing a wig with the costume, measure your head with the wig on so the hat will fit over the wig.
2. Wrap tape measure around head.
3. Pinch tape measure where it meets back at 0.
4. While still pinching, remove tape measure from head.

5. The number on the tape measure that you are pinching is your head measurement.
6. Divide head measurement by two then add 1 or 2 inches for a final measurement.
Note: pick 1 or 2 inches depending on how tight you want your hat to fit
7. Write the final measurement down on a piece of paper, for future reference.
8. Lay fabric on a table or other flat surface and fold fabric in half so that there are now two layers of fabric.
 Note: form an even ledge without overlap
9. On bottom edge of fabric using the tape measure, measure from left side edge towards the right, 0 to the final measurement.
10. With pencil/pen/marker, make a small dash mark indicating final measurement on fabric.
 11. Divide final measurement by two to determine middle point measurement.
12. Using tape measure for reference, find middle point measurement and make another dash mark.
13. From bottom edge of fabric at middle point measure upwards a minimum of 10 to a maximum of 18 inches
Note: the number of inches will be based on your personal preference for length of hat

14. With pencil/pen/marker make a final dash mark at the 10-18-inch point.
15. With markings showing fold fabric over so that 0 and the final measurement are now on top of each other, the middle markings should now be at the centerfold of fabric.
16. At the bottom edge of the fabric beginning at 0/final measurement cut diagonally to upper middle point.
Note: your fabric should now resemble the shape of a triangle
17. Lie out one triangle layer and apply fabric glue to outer right and left edges, leaving the smaller bottom edge unglued.
Note: this is inside of hat
18. After fabric glue is applied lay second triangle on top of bottom triangle so all edges are matching, and the fabric glue is at the same point on both triangles.
19. Allow time for glue to dry.
Note: follow fabric glue instructions for drying time
20. Once glue is dry, turn fabric inside out so that glued edges are now inside hat.
Green Tunic
Materials: Green mid-thigh length, short sleeve shirt or tunic, fabric tape measure, scissors, pencil/pen/marker, fabric glue, fabric hole punch, and 2 feet of brown yarn or brown suede thread.


1. On the right side, facing you, cut one slit 5-6 inches upwards from the bottom shirt hem.
2. Fold ½” of fabric at the slit inside shirt.
3. Glue ½” of fabric to the inside of the shirt.
 4. Repeat steps 1-3 on left side.

Note: The width of the sleeve should center on shoulder hem.

6. ½”upwards from first set of holes punched, punch two more holes directly above original holes punched.

7. Thread brown yarn/suede through the four punched holes in an X pattern.
Note: the length of yarn will be based on personal preference of the design choice.
8. Repeat steps 5-7 on left sleeve.
No comments:
Post a Comment